
This new media type can help you get creative, elevate storytelling and build highly immersive documents. To get you started, Microsoft has created a library of over 50 animated models available in Office.
Support for animated 3D models is rolled out to Office 365 Subscribers on:
– PowerPoint and Word on Windows PC: Version 1809 (Build 16.0.102827)
– Excel on Windows PC: Version 1904 (Build 16.0.11526)
– PowerPoint/Word/Excel on macOS: Build 16.24.226
This feature is not available on Office Perpetual, namely Office 2019 or 2016.
Getting Started
STEP 1
Firstly, you’ll need to insert an animated model.
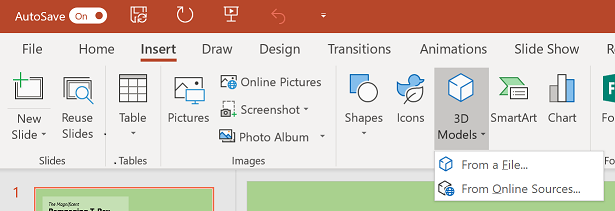
Navigate to Insert Tab > 3D Models > From Online Sources to peruse Office’s library of 3D models.
In the dialogue box, click the All Animated Models category. Insert any that catches your eye. There’s novel characters, education-focused examples, realistic animals and many more to pick from:
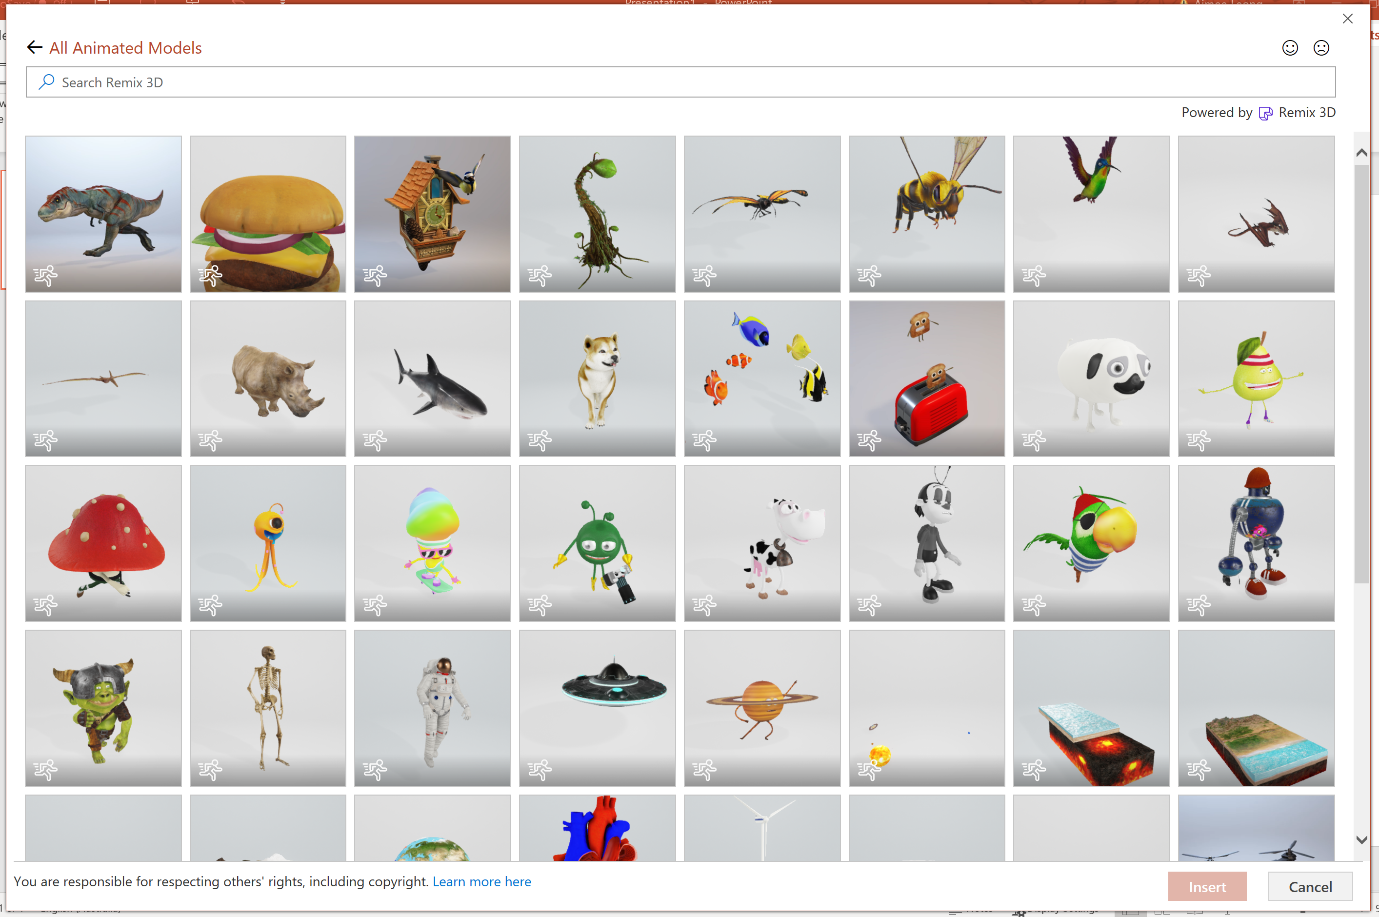

Tip: All animated models are badged with the ‘running man’ to easily identify:
Alternatively, insert your own animated model if you have one, via the Insert Tab > 3D Models > From File.
Office accepts .gltf and .fbx formats for animated models. Currently only skeletal animations are supported, with morph and node animation support coming very soon. Let us know via Send a Smile in the Office app if there are any issues with your insert.
STEP 2
Your inserted model will now animate in the editor!
STEP 3
To Play/Pause the animation, right-click on the model and select Play/Pause on the Floatie:

Tip: To quickly play/pause, select the model and hit spacebar
STEP 4
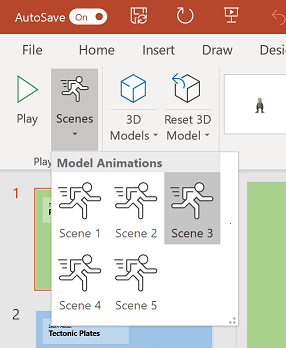
Animated models can have multiple animation scenes. To explore these, select the model and navigate to the Format Tab > Scenes:
Tip: To quickly explore the animation scenes, select the model and hit Ctr + Tab to toggle through the animations